Table of Contents
ToggleA tiny house studio, typically 100 to 400 square feet, turns spatial constraints into creative possibilities. Whether you’re downsizing to cut costs, embracing minimalism, or simply working with limited property, a well-designed studio can feel spacious and fully functional. The key isn’t making do with less: it’s designing smarter. This guide walks you through proven strategies to transform your compact space into a home that actually works for your lifestyle, covering everything from layout tactics to budget-friendly DIY tweaks that won’t require a contractor.
Key Takeaways
- A tiny house studio between 100–400 square feet becomes fully functional through intentional design, not by making do with less.
- Define zones using area rugs, furniture placement, and lighting rather than walls to create psychological separation in an open footprint.
- Vertical space is critical—loft beds, wall-mounted shelving, and overhead storage double usable volume without consuming floor area.
- Multi-functional furniture like platform beds with drawers and wall-folding desks are non-negotiable for maximizing a compact studio layout.
- Budget-friendly DIY projects—floating shelves, accent wall paint, and pegboard organization—deliver outsized impact at $40–$100 per project.
- Consistent flooring, layered lighting, and restrained color palettes make tiny house studios feel spacious and cohesive rather than cramped.
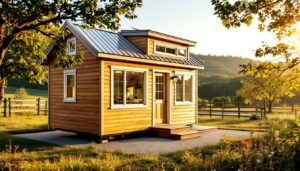
What Is a Tiny House Studio?
A tiny house studio is a self-contained living space, usually one large room, that combines sleeping, living, and sometimes cooking and working into a single, efficient footprint. Unlike traditional apartments, tiny studios prioritize intentional layout and multipurpose zones over spreading functions across separate rooms.
These aren’t budget afterthoughts: they’re designed retreats. A studio might feature a lofted bedroom with a work nook underneath, a galley kitchen tucked along one wall, and an open living area that doubles as an office. The magic happens when every square foot pulls its weight.
Tiny studios appeal to young professionals, remote workers, couples, and anyone tired of maintaining excess square footage. When built or renovated thoughtfully, a 250-square-foot studio can outperform a sprawling apartment. The difference? Intention. Every piece of furniture, every wall, every storage solution should earn its place.
If you’re starting from scratch or redesigning an existing space, understanding Tiny Home Design: Unlock Stylish, Sustainable Living with These Innovative Ideas gives you a foundation for what’s possible in compact homes.
Essential Design Principles for Tiny House Studios
Three core principles separate functional tiny studios from cramped afterthoughts: clarity of zones, smart vertical space, and honest material choices.
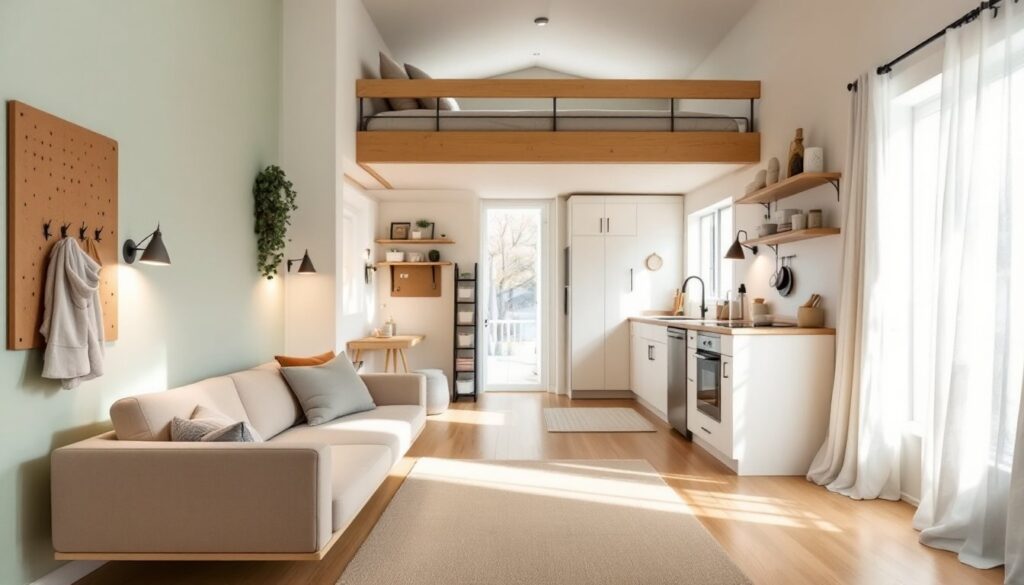
Zoning doesn’t mean walls. Use area rugs, furniture placement, lighting, or subtle level changes to define a bedroom nook, office corner, and living area within one open footprint. This psychological separation makes the space feel intentional, not cluttered.
Vertical is your best friend. A 250-square-foot footprint can double its usable volume by going up: loft beds, wall-mounted shelving, tall cabinets, and overhead storage reclaim what floor space can’t. Just plan traffic flow carefully, you’ll bump your head if you’re not thoughtful.
Material clarity matters. Avoid visual clutter by choosing a restrained palette: perhaps two wall colors max, one flooring type throughout, and consistent hardware finishes. This doesn’t mean bland: it means intentional. Light, reflective surfaces expand perceived space. Matte or textured finishes add warmth without visual noise.
Multi-Functional Furniture and Storage Solutions
Multi-functional pieces are non-negotiable. A platform bed with built-in drawers underneath eliminates a dresser. A desk that folds into the wall becomes living room wall space when closed. An ottoman that’s actually a storage trunk holds blankets and seasonal gear.
Built-in storage, shelving, cabinets, closets, is vastly superior to freestanding furniture. Built-ins don’t steal floor area, and they’re customizable to exact dimensions. If you’re renting and can’t modify walls, wall-mounted shelving and pegboards deliver similar benefits without the landlord hassle.
Consider a murphy bed or loft bed system if your ceiling height allows (typically 8.5+ feet for a comfortable loft). This unlocks an entire floor for daytime living. Pair it with a desk underneath or seating to maximize that reclaimed real estate.
Depth matters too. Shallow shelves (8 inches) work better than deep ones in small spaces, you’ll actually use what you can see and reach. Deep shelves turn into storage graveyards where items vanish.
Smartly organized systems, like those detailed in Organization in Tiny Homes:, prevent a tiny studio from feeling like it’s drowning in stuff. Category-based storage, clear bins, and labeled zones keep chaos at bay.
Layout Strategies That Work
Layout is everything in a studio. The same 300 square feet can feel spacious or suffocating depending on how zones are arranged.
Start by mapping traffic flow. Identify the primary entry and natural pathways. Avoid placing furniture that blocks sightlines from the door, a clear view into your space makes it feel larger instantly. Don’t cram the room edge-to-edge with furniture: leave breathing room along walls.
Position the bed away from the entry if possible. If a studio is your first glimpse when you walk in, the space reads as a bedroom, not a home. A bed tucked into a corner, lofted overhead, or hidden behind a partition keeps the visual impact of sleeping space separate from living space.
Kitchen placement depends on the existing layout and your actual cooking habits. A galley along one wall (32 inches wide minimum, with appliances on opposite sides) is efficient and keeps cooking zones from dominating the visual center. If you rarely cook, a compact prep area on a peninsula or counter edge suffices.
Lighting is invisible but essential. A single overhead fixture creates institutional shadows. Layer in task lighting (desk lamp, pendant above the bed), accent lighting (LED strips on shelving), and ambient options (dimmable wall sconces, string lights). This flexibility makes the space adaptable, bright for work, soft for evening.
Open-Concept Living and Zone Separation
Open-concept doesn’t mean zero boundaries. Even in a single room, you can create distinct zones without walls.
Area rugs are the simplest tool. A rug under the living area anchors that zone and visually separates it from the kitchen or bedroom nook. Rugs don’t cost a fortune and completely reshape spatial perception.
Furniture placement does heavy lifting. Arrange a sofa perpendicular to the wall (floating furniture) to create a defined living zone rather than pushing everything against walls. A low bookshelf doubles as a visual room divider, suggesting separate areas without blocking views or light.
Level changes add sophistication. A raised platform bed, sunken seating area, or even a half-step up to the kitchen nook creates physical separation that reads as intentional design. Building a platform requires basic carpentry, a frame of 2×6 joists with 3/4-inch plywood flooring, but transforms how a studio feels.
Partial walls and screens also work. A 3-foot-tall bookshelf or a folding room divider creates privacy without claustrophobia. Sliding barn doors on a track can close off a bedroom alcove or bathroom without eating up swing space like a traditional door.
For design inspiration across multiple projects, resources like IKEA Hackers showcase creative ways to adapt budget furniture for studio living through modified storage and space-saving configurations.
Color and material flow matter too. Consistent flooring throughout the studio, no transitions between rooms, makes the space read as one cohesive volume, even with zoning. If you have carpet in one area and tile in another, it visually shrinks the footprint.
Budget-Friendly DIY Projects for Your Studio
Not every improvement requires a contractor. Several DIY projects transform a studio without breaking your budget.
Built-in shelving is achievable for confident DIYers. Floating shelves mounted on French cleats (two interlocking strips of wood anchored to wall studs) hold surprising weight and are adjustable. Measure, find studs with a stud finder, secure the wall-mounted cleat with 2.5-inch lag bolts, and hang the shelf. A 36-inch shelf in wood and brackets runs $40–$80, dramatically cheaper than custom cabinetry.
Wall paint is the highest-impact, lowest-cost move. A light accent wall creates visual interest without consuming space. Two gallons of quality paint cover roughly 800 square feet: expect to spend $50–$80 for good paint. Prep is critical: patch holes, caulk gaps, and prime any patched areas before painting to avoid blotchy coverage.
Pegboard walls organize and decorate simultaneously. A full pegboard panel with hooks and bins costs $60–$100 and mounts directly over drywall in a few hours. It’s perfect for kitchen tools, office supplies, or hobby gear, everything visible and accessible.
Window treatments affect perceived space. Sheer curtains hung ceiling-to-floor on a tension rod add softness and make ceilings feel taller. Blackout shades underneath provide privacy and light control. Material cost is under $50: installation is minutes.
Underbed storage solutions require no building. Rolling bins slide beneath a platform or raised bed, reclaiming dead space for seasonal clothing or tools. Measure clearance first, most spaces accommodate 6–8 inches of height, then source appropriately sized bins. Labeling prevents the “where’d I put that?” game.
Murphy bed kits are DIY-friendly if you’re handy. Hardware kits (around $300–$500) come with detailed instructions and can be installed by two people in a weekend. The frame anchors to studs: plywood panels and a basic mattress complete the setup. This is a substantial project, but the space reclamation justifies the effort.
Accent lighting through LED strip installation involves minimal electrical work if using battery-powered or plug-in strips. Run them under floating shelves, along the headboard, or around the ceiling perimeter. Warm-white LEDs cost $20–$40 and instantly soften the studio’s ambiance.
When shopping for materials and hacks, Apartment Therapy regularly features budget-friendly small-space makeovers with step-by-step tutorials and sourcing tips.
Conclusion
A thriving tiny house studio balances smart layout, multipurpose design, and thoughtful details. Success comes from honest assessment of your needs, intentional zone definition, and vertical thinking. Whether you’re building new or redesigning an existing space, prioritize flow, storage, and lighting, the fundamentals that make small spaces feel alive. The projects outlined here, shelving, paint, and storage, are achievable without specialized skills and deliver outsized impact. Your studio isn’t a compromise: it’s a refined space that works harder than sprawling alternatives.